Carol Egan

  • About
  • Detox Tools
  • Speaking
  • Coaching
  • Results
  • Articles
  • Resources
  • Shop
  • Contact

Italian Stuffed Zucchini with Mushrooms, Walnuts & Marinara

July 28, 2025 By cegan

Serves: 2-6
Time: About 45–55 minutes

It’s zucchini season here in New England, and my favorite local organic farm is overflowing with the good stuff. I love stopping by, catching up with the amazing humans who grow my food, and seeing what’s fresh. Right now, they’ve got these massive zucchinis, the kind most people skip over, but I grab every time. They’re cheap, local, organic, and honestly? Perfect for stuffing.

There’s something kind of magical about cooking with food that was grown just a few miles away, by people you actually know and really enjoy. It makes the whole thing feel more alive, more grounded, more connected. This recipe comes out of that connection, very fresh, totally delicious, and rooted in the season.

This recipe makes enough for 2 to 6 servings, depending on the hunger level, or whether you’re starting with a garden salad. One big zucchini can go a long way!

Ingredients

  • 1 extra-large zucchini (10–12 inches long)
  • 1 tbsp olive oil
  • 1½ cups finely chopped mushrooms (like cremini or button)
  • ½ cup chopped walnuts
  • 2-3 garlic cloves, minced
  • ¼ cup finely diced onion
  • Scooped-out zucchini flesh from the center, finely chopped
  • 1/4 – 1/2 tsp fennel seeds, lightly crushed (adds a subtle Italian sausage flavor)
  • ¼ tsp crushed red pepper flakes (or to taste)
  • ½ tsp salt, plus more to taste
  • Fresh ground black pepper
  • ½ tsp dried oregano (or 1½ tsp fresh)
  • 1 tbsp chopped fresh parsley
  • 1 tbsp chopped fresh basil
  • 1½ cups marinara sauce (plus more if needed)
  • Optional: 1 tbsp nutritional yeast, or cheese of your choice

Instructions

  1. Prep the zucchini.
    Preheat the oven to 400°F (190°C). Slice the zucchini in half lengthwise and scoop out the center, leaving about a ½-inch shell. Finely chop the scooped-out zucchini flesh and set it aside — you’ll be adding it to the filling.

  2. Make the filling.
    Heat the olive oil in a large skillet over medium heat. Add the onion and cook for 2–3 minutes. Stir in the garlic, fennel seeds, red pepper flakes, and mushrooms. Cook until the mushrooms release their moisture and start to brown, about 5–7 minutes. Add the chopped zucchini flesh and walnuts, and cook for another 4–5 minutes, stirring occasionally, until most of the moisture has cooked off.

  3. Season it up.
    Stir in the salt, pepper, oregano, parsley, and basil. Add about ½ cup of marinara and mix well. Taste and adjust seasoning if needed.

  4. Stuff and bake.
    Spoon the filling into the zucchini boats. Place them in a baking dish and pour the remaining marinara sauce around them and a little over the top. Cover loosely and bake for 35-40 minutes. Uncover and bake another 15-20 minutes, until the zucchini is tender and everything’s bubbling.

  5. Serve.
    Finish with more fresh basil, and a sprinkle of nutritional yeast or vegan parm if you like. Serve warm.

Wrap-up

Honestly, this recipe hits the sweet spot for me;  the filling is veggie-packed with local love and full of flavor from ingredients I feel good about. Recipes like this remind me why I cook in the first place. It’s not just about the food (okay, it’s a lot about the food), it’s about the people, the season, and that sense of being connected to Nature and the Earth in small, local, feel-good ways.

Tip: Depending on the size of your extra-large zucchini, allow enough time for it all to cook through, without drying it out. 

Enjoy!


Love it? Share it!

  • Share on Facebook (Opens in new window) Facebook
  • Share on X (Opens in new window) X
  • Share on Pinterest (Opens in new window) Pinterest
  • Share on LinkedIn (Opens in new window) LinkedIn
  • Share on Tumblr (Opens in new window) Tumblr
  • Share on Pocket (Opens in new window) Pocket
  • Share on Reddit (Opens in new window) Reddit
  • Print (Opens in new window) Print
  • Email a link to a friend (Opens in new window) Email

Filed Under: Recipes

Raw Beet Salad with Avocado, Parsley & Mint

By cegan

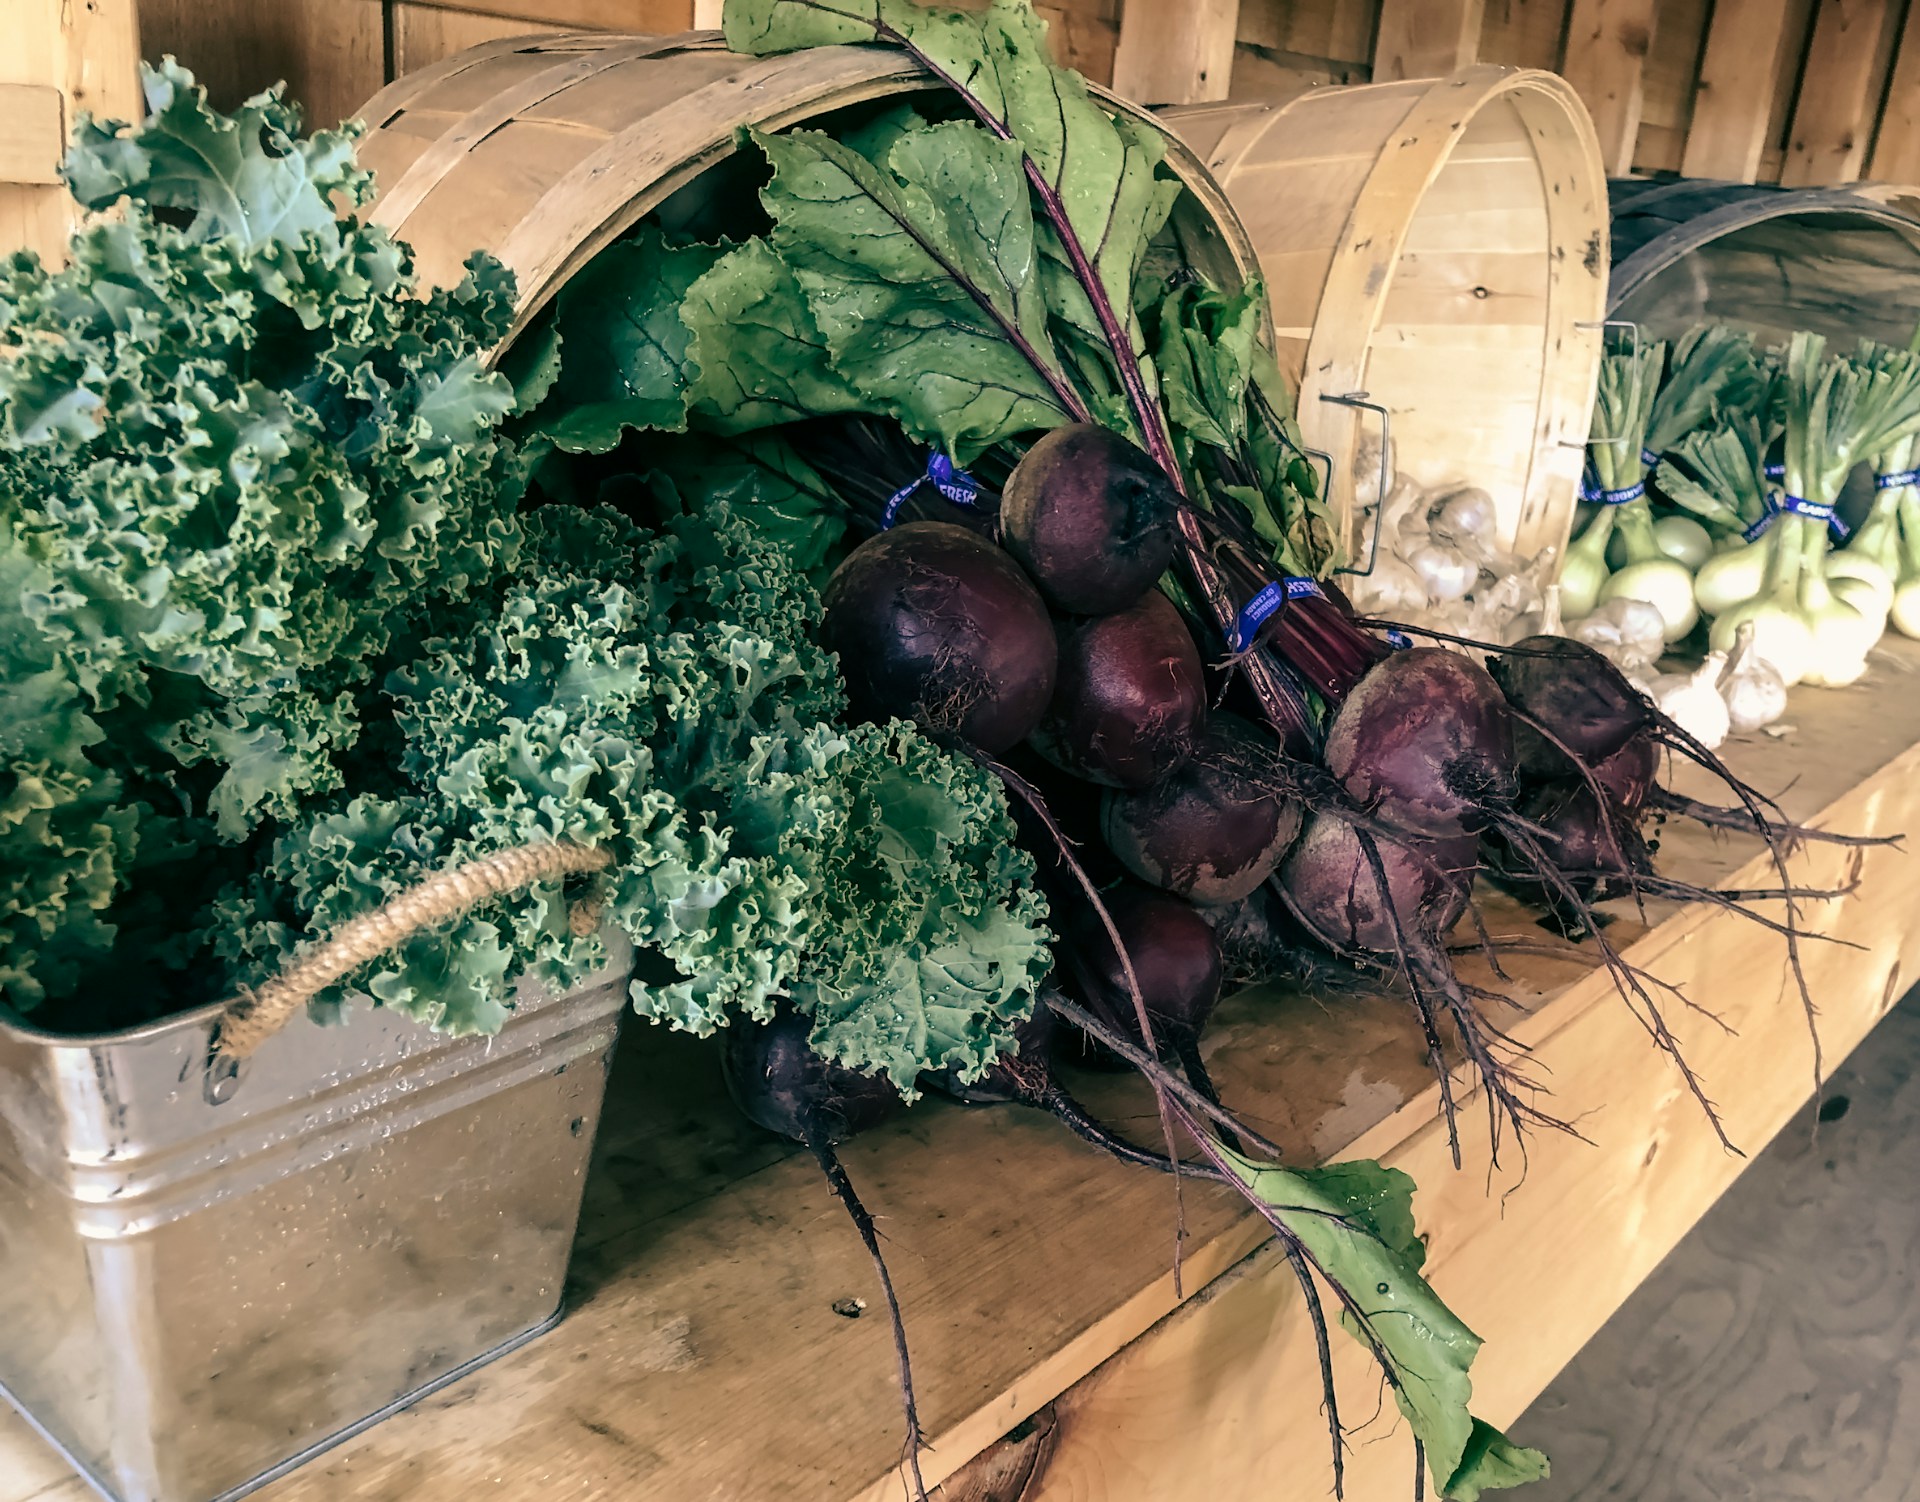
When my local farmer’s market had a glorious surplus of beets last weekend, I knew it was the universe nudging me to create something special. Beets are one of my all-time favorite vegetables, and one of nature’s most underrated superfoods. Rich in betalains, the antioxidant pigments that give beets their deep magenta hue and that support detoxification and cellular repair, beets are basically nature’s version of a detox app = they support liver function, reduce oxidative stress, and help our body clear out what it doesn’t need, with no subscription required!

They’re also incredibly grounding, grown deep in the earth, beets help us feel more rooted and calm, especially when eaten raw. Keeping them uncooked preserves their vibrant “life force” vitality, full of live enzymes, essential minerals, and a kind of energy we can actually feel! This simple yet elegant salad is my ode to Mother Nature, roots, connected, and full of life.

Recipe

Ingredients

  • 1 pound raw beets, peeled and thinly sliced with a mandolin

  • 1 ripe avocado, diced, sliced, or smashed

  • 1 tablespoon fresh parsley, finely chopped

  • 1 tablespoon fresh mint leaves, finely chopped

  • 2 tablespoons balsamic vinegar

  • 1 tablespoon extra-virgin olive oil

  • 1–2 teaspoons freshly squeezed lemon juice (optional but recommended for the brightness if adds!)

  • 2 teaspoons Dijon mustard

  • 1 large garlic clove, sliced crushed or finely minced (for steeping only)

  • ¼ teaspoon sea salt (plus more to taste)

  • ⅛ teaspoon freshly ground black pepper

Instructions

  1. Make the dressing:
    In a small bowl, mix balsamic vinegar, olive oil, Dijon mustard, lemon juice (if using), salt, pepper, and the crushed garlic. Let steep for 10+ minutes, then remove and discard the garlic.

  2. Dress the beets:
    Place sliced beets in a large bowl. Pour over the garlic-infused dressing and toss gently to coat. Let marinate for 10–15 minutes, or longer.

  3. Assemble the salad:
    Arrange the dressed beets on a serving platter or shallow bowl. Top with parsley, mint, and freshly diced avocado.

  4. Serve immediately to enjoy the avocado at its best.

Whether you’re beet-curious or a lifelong lover like me, this salad is a delicious way to stay rooted, radiant, and refreshed. Sometimes the simplest ingredients, straight from the ground are the ones that nourish us best, in all ways!

Enjoy!

Love it? Share it!

  • Share on Facebook (Opens in new window) Facebook
  • Share on X (Opens in new window) X
  • Share on Pinterest (Opens in new window) Pinterest
  • Share on LinkedIn (Opens in new window) LinkedIn
  • Share on Tumblr (Opens in new window) Tumblr
  • Share on Pocket (Opens in new window) Pocket
  • Share on Reddit (Opens in new window) Reddit
  • Print (Opens in new window) Print
  • Email a link to a friend (Opens in new window) Email

Filed Under: Recipes, Uncategorized

Simple, Crunchy, and Creamy: Your New Go-To Vegan Caesar

By cegan

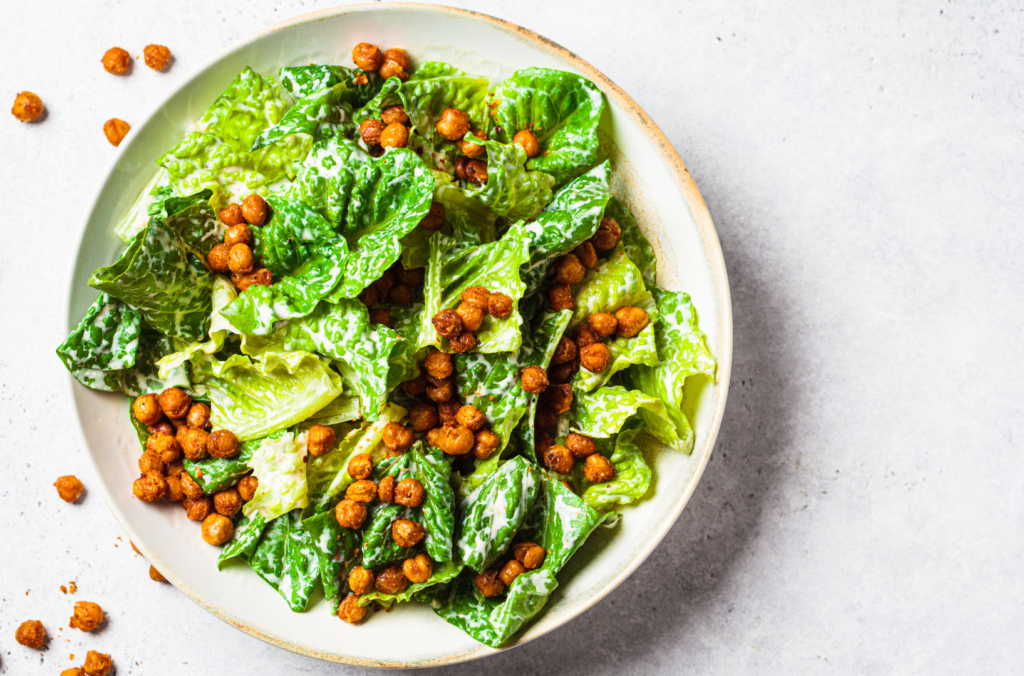
Gluten-free, dairy-free, packed with crunch, flavor, and bold flavor.

This isn’t just a salad. It’s a masterclass in plant-based magic. A Caesar that keeps everything you love—the creamy dressing, the briny depth, the satisfying crunch—but makes it smarter, fresher, easier… and completely gluten and dairy-free.

Cheers to something unforgettable!

Ingredients

For the Hummus-Based Vegan Caesar Dressing:

  • ½ cup hummus (store-bought or homemade—see recipe below)
  • 2 tbsp lemon juice (freshly squeezed, no bottled shortcuts)
  • 1 tbsp Dijon mustard (adds bite & depth)
  • 1 tbsp capers, finely chopped (briny magic)
  • 1 tbsp nutritional yeast (umami powerhouse)
  • 1 small garlic clove, minced (essential Caesar flavor)
  • 1 tbsp extra virgin olive oil (for richness)
  • 1 tsp vegan Worcestershire sauce
  • 1 tsp miso paste (white or chickpea, for deeper umami)
  • ½ tsp smoked paprika (optional, but adds warmth)
  • 1 tbsp aquafaba (from canned chickpeas, for silkiness)
  • 1 tsp apple cider vinegar (mimics Parmesan’s sharpness)
  • ½ tsp salt
  • ½ tsp black pepper
  • 1–2 tbsp water (to thin, if needed)

For the Greens:

  • 1 head romaine lettuce, chopped
  • 1 bunch lacinato kale, thinly sliced & massaged with a little lemon juice
  • 1 cup shaved Brussels sprouts (optional, but amazing)

For the Crunch (Choose One or Both):

Option 1: Toasted Chickpeas

  • 1 cup canned chickpeas, patted dry
  • 1 tbsp olive oil
  • ½ tsp salt
  • ½ tsp smoked paprika or garlic powder

Roast at 400°F for 20–25 minutes, shaking halfway. Crispy, golden perfection.

Option 2: Almond “Parm” Crumble

  • ½ cup almonds
  • 1 tbsp nutritional yeast
  • ½ tsp garlic powder
  • Pinch of salt

Pulse in a food processor until crumbly. Nutty, cheesy, ridiculously good.

Extras (Optional, but Highly Recommended)

  • ¼ cup marinated caper berries (briny flavor bombs)
  • ¼ cup thinly shaved red onion (adds a little bite)
  • 1 avocado, sliced (for creamy contrast)
  • ¼ cup pumpkin seeds (for more crunch & depth)

Instructions

Step 1: Make the Dressing

  1. In a bowl, whisk together the hummus, lemon juice, Dijon mustard, capers, nutritional yeast, garlic, olive oil, Worcestershire, miso, smoked paprika, aquafaba, and apple cider vinegar.
  2. Taste. Adjust salt, lemon, or umami to your liking.
  3. Add water, a tablespoon at a time, until you reach a creamy but pourable consistency.
  4. Let it sit for 15 minutes (if you have the patience). The flavors get even better.

Step 2: Prepare the Greens

  1. In a large bowl, toss the romaine, kale, and shaved Brussels sprouts together.
  2. Massage the kale with a little lemon juice first—this softens the texture and makes it taste incredible.

Step 3: Make the Crunch

  1. For Toasted Chickpeas: Toss chickpeas with olive oil, salt, and smoked paprika, then roast at 400°F (200°C) for 20–25 minutes.
  2. For Almond “Parm” Crumble: Blitz almonds, nutritional yeast, garlic powder, and salt in a food processor until you get a crumbly texture.

Step 4: Assemble the Salad

  1. Drizzle the dressing over the greens and toss until every leaf is coated.
  2. Top with toasted chickpeas, almond parm, and any extra add-ins like capers, red onion, avocado, or pumpkin seeds.
  3. Finish with a drizzle of olive oil and a final squeeze of lemon.

Bonus: The Best Cava-Style Hummus

If you want to go all in and make the perfect hummus base for this dressing, here’s how you make it silky-smooth and restaurant-level delicious.

Ingredients:

  • 1 can (15 oz) chickpeas, drained and peeled
  • ¼ cup tahini (high-quality & runny)
  • 2 tbsp lemon juice
  • 1 small garlic clove (raw or roasted)
  • ½ tsp salt
  • ¼ tsp ground cumin
  • 2 tbsp ice water (for fluffiness)
  • 2 tbsp olive oil
  • 1 tbsp white vinegar (Cava’s secret touch)

Instructions:

  1. Blend the tahini and lemon juice first until whipped and creamy.
  2. Add garlic, salt, cumin, and chickpeas. Blend until mostly smooth.
  3. Drizzle in ice water, a little at a time, until you reach a super-smooth consistency.
  4. Taste, adjust, and finish with olive oil and a final blend.

Final Thoughts: This Salad Isn’t Just Good—It’s a Game-Changer

This is a Caesar with depth. A Caesar with layers. A salad that isn’t about what’s missing—it’s about what’s possible.

  • Dressing? Creamy, umami-packed, and rich.
  • Greens? Crisp, hearty, and ready to soak up all that flavor.
  • Crunch? Completely gluten-free and wildly satisfying.
  • Nutrients? Fiber, healthy fats, and plant-based protein to keep you fueled.
  • Overall? A salad you’ll make again. And again. And again.

Because plant-based eating should never be a compromise. It should be bold. It should be satisfying. And it should be delicious.

Love it? Share it!

  • Share on Facebook (Opens in new window) Facebook
  • Share on X (Opens in new window) X
  • Share on Pinterest (Opens in new window) Pinterest
  • Share on LinkedIn (Opens in new window) LinkedIn
  • Share on Tumblr (Opens in new window) Tumblr
  • Share on Pocket (Opens in new window) Pocket
  • Share on Reddit (Opens in new window) Reddit
  • Print (Opens in new window) Print
  • Email a link to a friend (Opens in new window) Email

Filed Under: Recipes, Uncategorized

Simple Ingredients, Big Health Impacts

By cegan

There’s quiet power in small, consistent, intentional choices. Ever feel like your body needs a reset when you wake up? One of my favorite ways to kick off the day—and keep it steady—is with this simple, warm, cleansing drink: lemon water and Bragg’s Apple Cider Vinegar (ACV).

I know it seems simple, even benign. But sometimes, simple is exactly what we need. This drink has been a game-changer for me and my clients. It supports digestion, energy, and overall balance in an effortless way. Here’s the recipe:

Morning Lemon and Apple Cider Vinegar Drink

Ingredients:

  • 1 cup (8 oz) warm, distilled water (not boiling)
  • Juice of half a lemon (approximately 1 tablespoon)
  • 1–2 teaspoons raw, unfiltered apple cider vinegar (with “the mother”—Bragg’s is my favorite)
  • Optional: A pinch of ground cinnamon or a drizzle of raw honey

Instructions:

  1. Prepare Your Water: Warm the water to a comfortable drinking temperature—warm, not hot, to preserve the nutrients.
  2. Squeeze the Lemon Juice: Cut a fresh lemon and squeeze the juice into the water, straining seeds as needed.
  3. Add the Apple Cider Vinegar: Start with 1 teaspoon of ACV if you’re new to it; increase to 2 teaspoons as you adjust.
  4. Customize (Optional): Add cinnamon for its anti-inflammatory benefits or honey for a touch of sweetness.
  5. Mix and Sip: Stir well and drink on an empty stomach, savoring the subtle tang as it prepares your body for the day.

Here’s Why This Drink Works

This warm, simple combo isn’t just a morning beverage; it’s a strategy for whole-body health. Together, lemon and ACV form a potent duo that delivers measurable benefits:

  • Supports Digestion: Aids in nutrient breakdown and absorption, reducing post-meal sluggishness.
  • Regulates Blood Sugar: Slows sugar absorption, helping prevent spikes and crashes.
  • Enhances Detoxification: Stimulates lymphatic flow and improves circulation to flush stored toxins.
  • Boosts Immunity: Rich in antioxidants that combat oxidative stress and support immune defenses.
  • Promotes Heart Health: May regulate cholesterol and encourage healthy blood pressure when combined with a healthy diet.
  • Balances Microbiome: Fosters good gut bacteria while discouraging harmful strains.
  • Skin and Glow: Calms inflammation and strengthens the gut-skin connection for a natural radiance.
  • Anti-Microbial Properties: Protects against harmful bacteria, enhancing systemic health.
  • Alkalizing Effect: Despite their acidity, they help maintain a balanced, low-inflammatory internal environment.

Hydration Meets Detoxification

Mornings are all about reset and renewal, right? While you sleep, your body’s hard at work—repairing, detoxifying, and recharging for the day ahead. That’s why starting with hydration is so important. Lemon is like a natural detox cheerleader. It’s packed with vitamin C and bioflavonoids that give your liver the boost it needs to do its job well. Plus, it supports the production of glutathione, a powerful antioxidant that helps neutralize toxins, flush out waste, and keep your system running smoothly.

Balancing Your Inner Terrain

Don’t let their tangy taste stop you—lemon and ACV work together to reduce inflammation, support a thriving gut microbiome, and promote an alkaline environment. Lemon provides bioflavonoids and vitamin C to combat oxidative stress, while ACV’s acetic acid promotes digestion and microbial balance.

Skin, Immunity, and Glow

Your skin? It’s a reflection of your inner health. When your body’s systems are balanced, your skin appears clearer, calmer, and more radiant. Lemon’s vitamin C and antioxidants combat oxidative stress, which contributes to inflammation and aging, while ACV promotes gut health by supporting beneficial bacteria. Since much of your skin’s health starts in the gut, this combination nourishes your body from the inside out—with benefits no fancy creams can provide.

Drink It Your Way

Sip it in the morning to support digestion and energize your day, or enjoy a diluted version in the afternoon for gentle detox support. The key is consistency—start small, listen to your body, and let this simple habit become a natural part of your routine.

Simple Ingredients, Big Impact

This drink may seem benign, but its power lies in repetition.  As Darren Hardy says in The Compound Effect:

Small, smart choices + consistency + time = radical difference.

Let’s raise a glass to the power of small habits with big results!

Love it? Share it!

  • Share on Facebook (Opens in new window) Facebook
  • Share on X (Opens in new window) X
  • Share on Pinterest (Opens in new window) Pinterest
  • Share on LinkedIn (Opens in new window) LinkedIn
  • Share on Tumblr (Opens in new window) Tumblr
  • Share on Pocket (Opens in new window) Pocket
  • Share on Reddit (Opens in new window) Reddit
  • Print (Opens in new window) Print
  • Email a link to a friend (Opens in new window) Email

Filed Under: Recipes, Uncategorized

Creamed Peas and Pearl Onions

By cegan

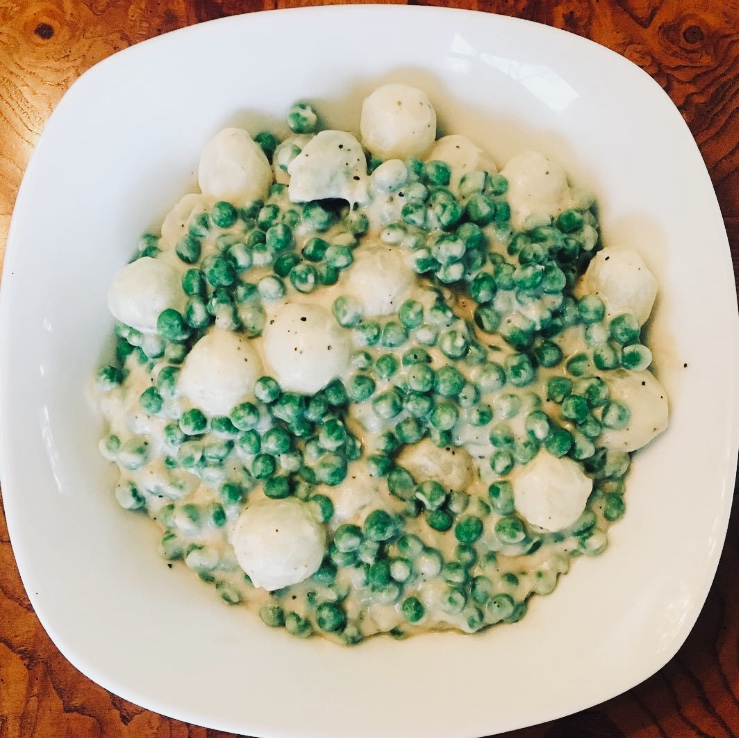
My Dad LOVED Creamed Peas and Pearl Onions, so I made this recipe in his honor, for YOU! He would have LOVED this recipe, because every ingredient is so clean, fresh and… plus the recipe is gluten-free, dairy-free, paleo-friendly AND super delicious. When you look over the ingredients, you’ll feel confident that everyone will love the fresh spin of this holiday classic… It’s a total crowd-pleaser, because even those with food sensitives can indulge — Booyah!

Yes, I always recommend organic as your first choice for all ingredients, when available.

Ingredients: 

  • 2 cups of fresh or frozen peas
  • 10 ounce bag of fresh pearl onions
  • 1 parsnip, chopped in food processor
  • 1/2 small onion, diced
  • 1 cup almond milk
  • Sea salt and cracked black pepper to taste

Sauce: 

Saute onion and parsnip until cooked and tender. Add to Vitamin or high-speed blender with almond milk, sea salt and cracked black pepper. Puree until well-combined and creamy.

Pearl Onions: Immerse in boiling water for 2-3 minutes. Remove. Let cool. Cut the root end and pinch out of onion skin.

In saute pan: Add peas, onions and sauce and simmer on a low heat until vegetables and flavors come together. Season with salt and pepper to taste.

Buono Appetito! Happy Holidays!

If you make this recipe, I’d love to hear how you liked it in the comments below!

Love it? Share it!

  • Share on Facebook (Opens in new window) Facebook
  • Share on X (Opens in new window) X
  • Share on Pinterest (Opens in new window) Pinterest
  • Share on LinkedIn (Opens in new window) LinkedIn
  • Share on Tumblr (Opens in new window) Tumblr
  • Share on Pocket (Opens in new window) Pocket
  • Share on Reddit (Opens in new window) Reddit
  • Print (Opens in new window) Print
  • Email a link to a friend (Opens in new window) Email

Filed Under: Recipes, Uncategorized

Forager’s Pie

By cegan

Forager’s Pie is said to be the “hot cousin” of Shepard’s pie. I like that, in the spirt of ‘out with the old, in with the new.’ This recipe then is, yet again, a fresh spin on another classic, with a lighter, cleaner line-up of ingredients!

The idea of foraging conjures up hunting and gathering — I love this idea of spending hours hunting for the perfect mushrooms in the ‘wild,’ but that I don’t know much about which ones are safe, and which ones aren’t, I went to Whole Foods and filled a bag with shiitakes and baby portobellos!

The mushrooms, with the marsala wine and fresh thyme and rosemary, add a rich savoriness that says Fall through and through.

You’ll love this recipe! It’s so good, that a crust would only get in the way!

Ingredients

  • 1 large Vidalia onion, diced
  • 4 cloves garlic, minced
  • 5 carrots, peeled and diced
  • 2 pounds shiitake mushrooms (or personal favorite), cleaned and sliced
  • 2 pounds steamed sweet potatoes (2 medium sized, 1 extra large), pureed
  • 3/4 cup marsala wine
  • 1 1/2 cup Kite Hill, ricotta cheese
  • 2 Tablespoons coconut oil
  • 1/2 teaspoon fresh thyme, minced
  • 1/2 teaspoon fresh rosemary, minced
  • 1/2 cup, fresh parsley, minced
  • 1 cup almond milk
  • sea salt and cracked black pepper to taste

Preparation

Puree steamed sweet potatoes in food processor, with 3/4 cup of almond milk ricotta, sea salt and black pepper until creamy and well-combined. Set aside.

Saute onion, garlic, carrots, coconut oil, sea salt and cracked black pepper on medium-low, until translucent. Add marsala wine and simmer for 5 minutes. Add mushrooms, fresh thyme and rosemary, and simmer until tender. Add almond milk and 3/4 cup ricotta — Stir until well-combined.

Scoop vegetable/mushroom sauté into a glass baking dish. Layer half the fresh parsley. Top with pureed sweet potato. Bake at 350° for 45 minutes. Top with remaining parsley and serve!

Optional: Add a layer of sautéed greens of your choice: Spinach, Swiss chard and broccoli rabe are all great choices!

Buono Appetito! 

If you make this recipe, I’d LOVE to hear how you like it in the comments section below!

Love it? Share it!

  • Share on Facebook (Opens in new window) Facebook
  • Share on X (Opens in new window) X
  • Share on Pinterest (Opens in new window) Pinterest
  • Share on LinkedIn (Opens in new window) LinkedIn
  • Share on Tumblr (Opens in new window) Tumblr
  • Share on Pocket (Opens in new window) Pocket
  • Share on Reddit (Opens in new window) Reddit
  • Print (Opens in new window) Print
  • Email a link to a friend (Opens in new window) Email

Filed Under: Recipes, Uncategorized

Fresh Pumpkin Pie

By cegan

Most everyone loves pumpkin pie around the holidays… and like everything I make, I say fresh is best!

While I’ve used fresh pumpkin, I LOVE the ease of substituting sweet potatoes because they’re easier to handle, as James Beard-nominated chef Matthew Kenney suggests. So in this Fresh Pumpkin Pie recipe, I’m giving you the choice to use either pumpkin or sweet potatoes. Whatever you choose, they taste very similar. Heck, even Betty Crocker said to feel free to use them interchangeably back in the 1950s!

This gluten-free, sugar-free, dairy-free and paleo-friendly recipe is the best I’ve found to date for a fresh pumpkin pie! The almond milk ricotta beautifully takes the place of cornstarch and cream to hold the filling together and add to the pie’s overall custard-like creaminess — think pumpkin cheesecake! The stevia can be used liberally without fear of slipping into a sugar-coma after dinner, and all the ingredients come together for a delicious and healthy dessert for you and your family!

I challenge you to find a real pumpkin pie recipe (you’d have to spend hours on that alone) that’s as fresh and delicious as this recipe!

Crust:

  • 3/4 cup walnuts
  • 3/4 cup pecans
  • 1/2 cup dates or dried apricots
  • Vanilla powder or extract
  • Pinch sea salt

Place the nuts, dates (and/or apricots), vanilla and sea salt in a food processor and process until a fine crumble forms and sticks together. Press the mixture into a glass pie dish using fingertips lightly dampened with water to prevent sticking. Feel for highs and lows in the mixture and press it evenly into the baking dish. Refrigerate until ready.

Filling:

  • 3 cups mashed pumpkin or sweet potatoes (process in food processor until smooth)
  • 1 cup Kite Hill almond milk ricotta
  • 1/2+ cup almond milk (add accordingly to maintain a thick texture)
  • 3 teaspoons vanilla extract
  • 2 teaspoons ground cinnamon
  • 1 teaspoon ground nutmeg
  • 1/4 teaspoon ground clove
  • 1/2 teaspoon salt
  • Stevia to taste

Instructions:

In a Vitamix, process all ingredients until well-combined (add the almond milk slowly to maintain a thick, creamy blend).

Preheat oven to 350°.

Pour filling into pie shell and bake for 30 minutes (watch carefully to avoid burning the crust).

Let cool for 30 minutes or more.

For a dairy-free whipped topping, beat full-fat coconut milk with hand-held beaters, adding vanilla and stevia to taste!

Serve and enjoy!

Love it? Share it!

  • Share on Facebook (Opens in new window) Facebook
  • Share on X (Opens in new window) X
  • Share on Pinterest (Opens in new window) Pinterest
  • Share on LinkedIn (Opens in new window) LinkedIn
  • Share on Tumblr (Opens in new window) Tumblr
  • Share on Pocket (Opens in new window) Pocket
  • Share on Reddit (Opens in new window) Reddit
  • Print (Opens in new window) Print
  • Email a link to a friend (Opens in new window) Email

Filed Under: Recipes, Uncategorized

Roasted Root Vegetables

By cegan

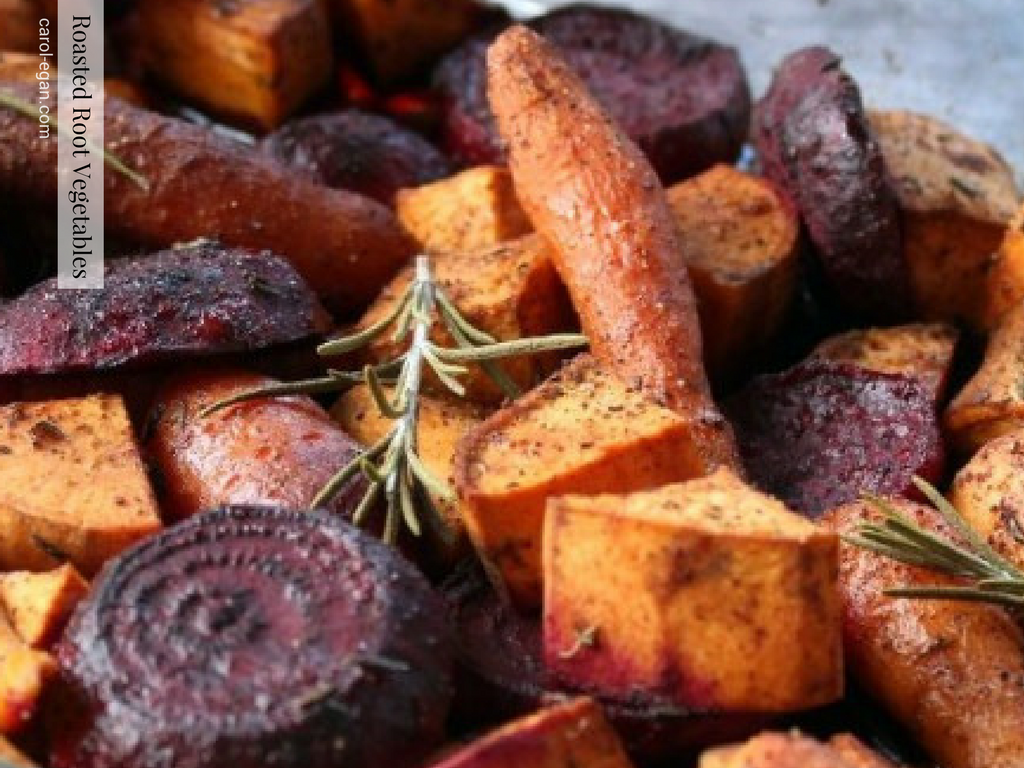
For a gorgeous blend of seasonal color and flavor, this hearty roasted root vegetable side dish is sure to be a healthy star at your seasonal celebrations!

Ingredients: 

  • 3 medium red beets, washed and sliced thickly in 1 inch rounds
  • 3 medium sweet potatoes or yams, washed and sliced thickly in 1 inch rounds
  • 3 carrots, washed and cut in 3 inch pieces
  • 3 parsnips, washed and cut in 3 inch pieces
  • 1 -2 sweet onion, sliced thickly
  • 1 head of garlic, peeled and separated cloves
  • Fine sea salt to taste
  • Cracked black pepper to taste
  • 1 teaspoon minced fresh rosemary
  • 2 Tablespoons coconut oil

*  If you want to spin this recipe to be sweeter and still healthy, as an alternative to the overly-sweet version of holiday sweet potatoes, toss the cut vegetables in a stevia infused olive oil, before you place them in the baking dish. Drizzle the remaining sweetened oil over top, per the directions below.

Assemble:

Preheat oven to 375.

Cover the bottom of a large glass baking dish with coconut oil. Place red beet slices and sweet potato slices flat in the baking dish. Add carrots and parsnips. Cover with onion slices and whole garlic cloves. Sprinkle with sea salt, cracked black pepper and fresh rosemary. Roast for about 1 hour, or until tender.

Arrange all roasted vegetables on a serving platter. Serve and enjoy!

Buono Appetito! 

Love it? Share it!

  • Share on Facebook (Opens in new window) Facebook
  • Share on X (Opens in new window) X
  • Share on Pinterest (Opens in new window) Pinterest
  • Share on LinkedIn (Opens in new window) LinkedIn
  • Share on Tumblr (Opens in new window) Tumblr
  • Share on Pocket (Opens in new window) Pocket
  • Share on Reddit (Opens in new window) Reddit
  • Print (Opens in new window) Print
  • Email a link to a friend (Opens in new window) Email

Filed Under: Recipes, Uncategorized

Fresh Cranberry & Fruit Relish

By cegan

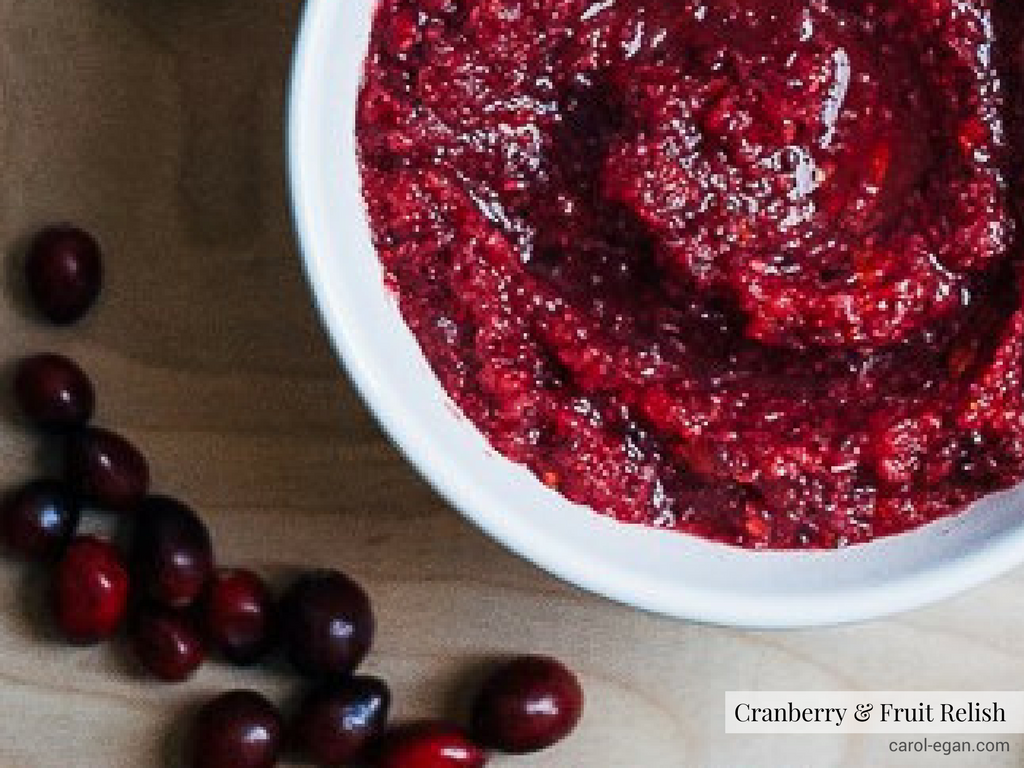
Fresh cranberries are available for only a short season each year, so I say put the traditional canned, or overly processed cranberry sauce aside this year and try my Fresh Cranberry & Fruit Relish for your holiday festivities.

Every ingredient is fresh, healthy and distinct to the season, with their bright, tart and sweet flavors blending in perfect balance.  Since this recipe is not cooked, I recommend you make it the day before, so all the flavors marinated and meld together.

Ingredients: 

  • 1 bag of fresh cranberries, rinsed and picked over
  • 1 medium apple, peeled, cored and deseeded
  • 1 large orange, peeled and deseeded 
  • 1 cup fresh raspberries
  • 1/2 cup orange juice (only to achieve desired texture)
  • Stevia to taste
  • Pinch of Sea Salt
  • Reserve a few whole cranberries and thin orange skin curls for garnish

Optional:

  • 1 Tablespoon Fresh Ginger
  • 1 teaspoon Cinnamon

Pulse each ingredient separately in a food processor. Add to bowl on the side. When done pulsing, add orange juice (to achieve desired texture), stevia and sea salt. Pulse fresh ginger if desired, and add with cinnamon. Mix to thoroughly combine.  

Garnish with whole cranberries and/or orange skin curls.*

* To Make the Orange Curls: Make a slice through one side of the peel and the pulp, all the way up to the rind on the other side. Cut the pulp off of the peel so that you have one long thin strip of peel. Twist the peel into a curly-q shape. The peel will naturally hold its shape.

Buono Apetito! 

After you make this recipe, I’d love to hear how you and your family liked it in the comments below! Happy Holidays!

Love it? Share it!

  • Share on Facebook (Opens in new window) Facebook
  • Share on X (Opens in new window) X
  • Share on Pinterest (Opens in new window) Pinterest
  • Share on LinkedIn (Opens in new window) LinkedIn
  • Share on Tumblr (Opens in new window) Tumblr
  • Share on Pocket (Opens in new window) Pocket
  • Share on Reddit (Opens in new window) Reddit
  • Print (Opens in new window) Print
  • Email a link to a friend (Opens in new window) Email

Filed Under: Recipes, Uncategorized

Healthy & Delicious Green Bean Casserole

By cegan

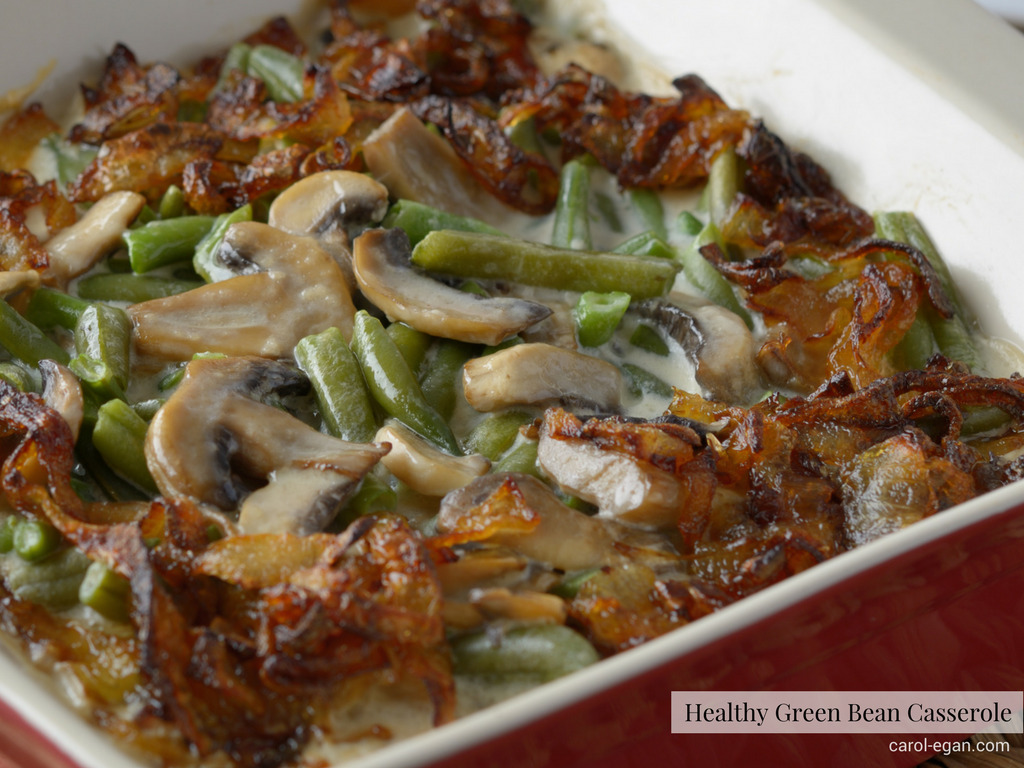
If you’ve followed me for a while, you know I love to spin healthy recipes from classic, , unhealthy favorites! With the holidays’s approaching, I couldn’t resist creating an uber healthy and delicious spin on “Green Bean Casserole.”

Whole foods. Nothing processed. Vegan. Paleo. Nut-free. Clean. Fresh and delicious. This is a total crowd-pleaser!

Indeed, everyone around your holiday table this year will be saying, “OMG, WHO made the Green Bean Casserole this year? This recipe is to-die-for!”

Healthy Green Bean Casserole is super delicious, super healthy and with every flavor that you’re used to tasting in this classic holiday dish, sans the processed, nutrient-devoid and inflammatory ingredients of the of days gone by recipe!

Ingredients: 

  • 1 – 1/2 pounds green beans, clipped and cleaned
  • 1 pound parsnips, diced
  • 1 pound mushrooms, sliced
  • 1 Vidalia onion, sliced thin
  • 1 1/2 small onion, diced and sautéed
  • 1 clove garlic, minced and sautéed
  • 1 Tablespoon coconut oil
  • Water
  • Sea salt and cracked black pepper

Crispy Caramelized Onions:

  • 1 large Vidalia onion, sliced thin
  • Sauté slowly over medium low heat until caramelized and crispy, a tablespoon of coconut oil, sliced Vidalia onion, sea salt and cracked black pepper. Set aside.

Sautéed Onion & Garlic:

  • 1/2 small onion
  • garlic
  • Saute until clear and translucent over medium-low heat

Mushrooms:

  • Saute until tender, mushrooms, sea salt and cracked black pepper. Set Aside.

Parsnips:

  • Steam al dente — firm but slightly tender

Green Beans:

  • Steam lightly to a firm texture

Sauce:

In a Vitamix or high-speed blender, puree parsnips, 1/4 of sautéed mushrooms, sautéed 1/2 small onion and garlic, sea salt and cracked black pepper. Add water slowly to achieve a smooth, creamy texture.

Combine & Cook: 

In a large bowl, toss green beans, remaining mushrooms and sauce until well combined. Pour into a glass baking dish and bake at 375° until browning and bubbly. Top with caramelized onions and serve!

Buono Appetito!

Love it? Share it!

  • Share on Facebook (Opens in new window) Facebook
  • Share on X (Opens in new window) X
  • Share on Pinterest (Opens in new window) Pinterest
  • Share on LinkedIn (Opens in new window) LinkedIn
  • Share on Tumblr (Opens in new window) Tumblr
  • Share on Pocket (Opens in new window) Pocket
  • Share on Reddit (Opens in new window) Reddit
  • Print (Opens in new window) Print
  • Email a link to a friend (Opens in new window) Email

Filed Under: Recipes, Uncategorized

  • 1
  • 2
  • 3
  • …
  • 6
  • Next Page »

Search & You Shall Find

Topics

  • Environmental Toxins
  • Gut Issues & Bloating
  • Headaches, Brain Fog & Focus
  • Health Hacks
  • Mind-Body-Spirit Connection
  • Protein and Real Food Nutrition
  • Recipes
  • Root Cause
  • Start Here
  • Success Stories

DOWNLOAD YOUR FREE GUIDE

GET ON THE WAITLIST NOW!

FREE DETOX TIPS IN YOUR INBOX

As Seen In:

Forbes Huffington Post Better Connecticut Bella Mia Magazine Boston News Network Blog Talk Radio

Carol Egan – Heal Your Digestion to Heal Your Life

  • Facebook
  • Pinterest
  • Twitter

Let’s Talk About Health

I work with accomplished professionals who want to look and feel as healthy as they are successful. They spent years prioritizing success over health, and are now troubled by excess weight, exhaustion, and foggy thinking at work and home. I help them take control of their health, so they can focus on what matters in their life and career.

Schedule Your Call

Copyright © 2026 by Carol Egan · Privacy Policy · Disclaimer· Terms and Conditions